Tools You May Need:
- Allen key (usually included)
- Phillips screwdriver
- Heat-resistant gloves (optional but recommended)
- Soft cloth (to wipe surfaces)
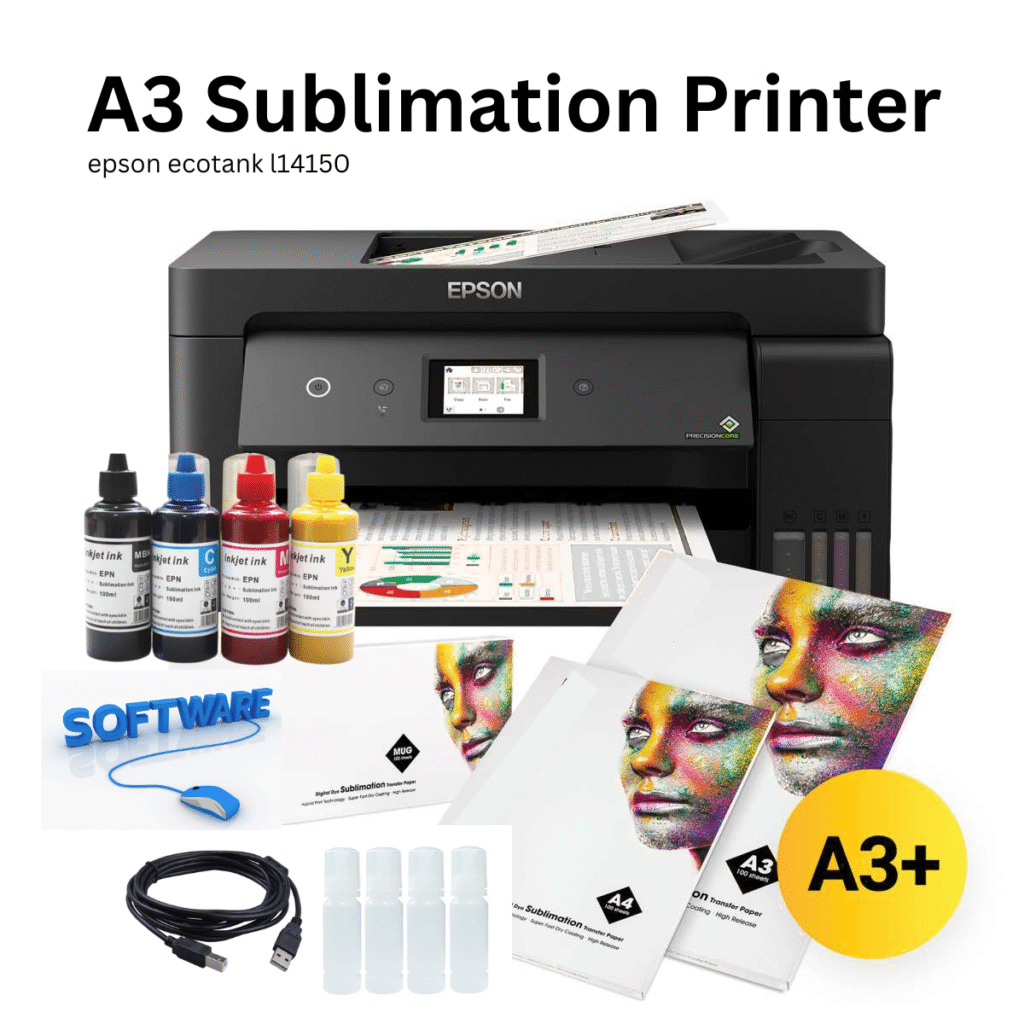
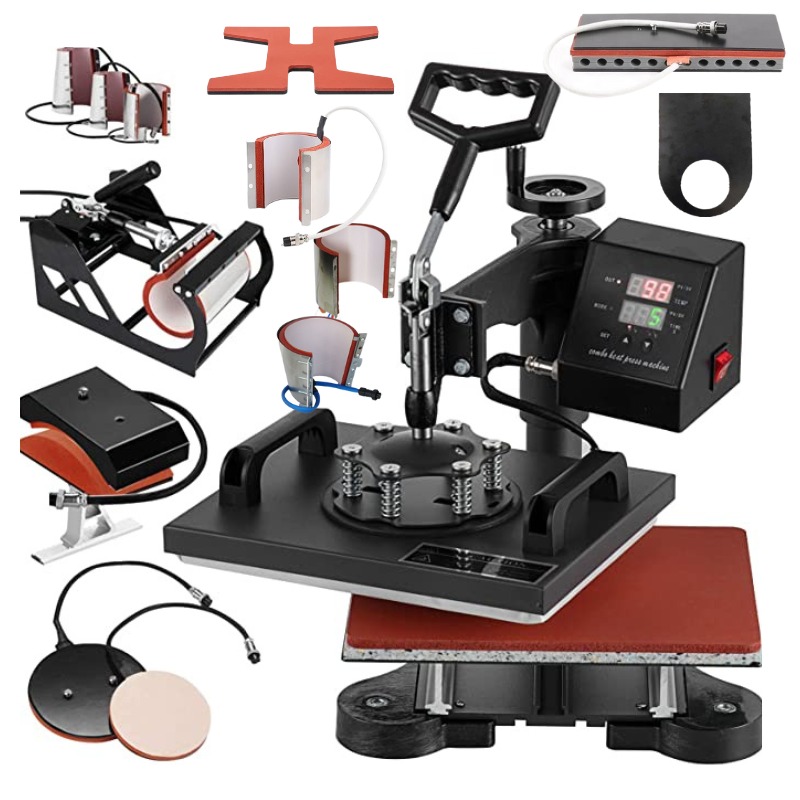
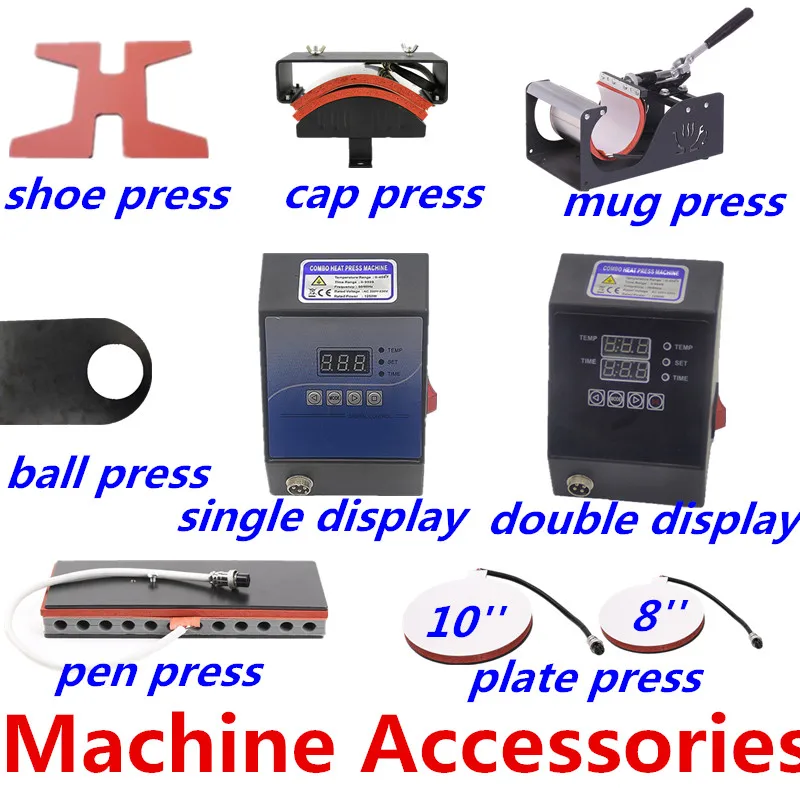
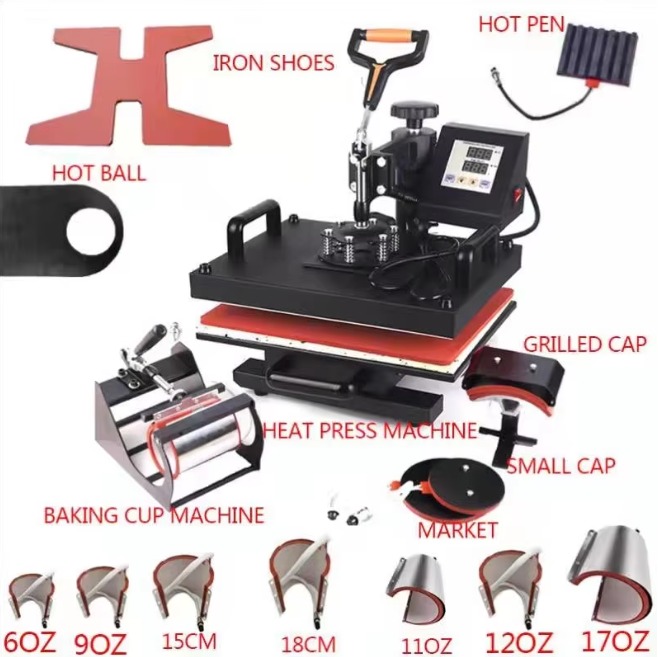
MAIN ACCESSORIES YOU CAN SWAP:
- T-shirt press (flat press) – default on machine
- Mug press – for mugs (various sizes)
- Cap/hat press – curved base
- Plate press – 2 sizes (small and large)
GENERAL STEPS FOR ACCESSORY REPLACEMENT
STEP 1: Turn Off & Unplug the Machine
Always switch off and unplug the heat press before changing any accessory to avoid electric shock or burns.
 STEP 2: Let It Cool Down
If the machine was recently used, wait until all surfaces have cooled completely.
 STEP 3: Remove the T-shirt Press (Flat Platen)
- Disconnect the heating element cable (usually a 4-pin plug or screw-tight plug) from the control box.
- Unscrew the mounting bolts (typically two bolts under the top platen or around the hinge).
- Lift the top platen straight up to remove it.
STEP 4: Install a New Accessory (Example: Mug Press)
Mug Press
- Align the mug press base where the T-shirt press was removed.
- Bolt it in place using the same mounting screws.
- Connect the heating element plug into the control box (match the pin layout).
- Switch the machine back on, and choose mug temperature/time settings.
Tip: Your mug press may have multiple mug elements (e.g., 11oz, 6oz, latte). Each one can plug into the same mug press base. Just unplug and switch them out.
STEP 5: For Cap/Hat Press
- Remove the flat press.
- Mount the curved hat base using the bolts provided.
- Attach the heating element for the hat press and plug it into the main controller.
- You may need to slightly adjust pressure settings for curved items.
STEP 6: For Plate Press
- Install the round base plate by bolting it where the lower platen usually sits.
- Attach the round upper heating element.
- Plug in the round heating element into the control box.
 Important: When installing plate presses, always check that the heating element doesn’t directly touch the plate before pressing down. Use heat-resistant tape to hold transfers.

STEP 7: Test Before Using
- Turn on the heat press.
- Set the correct temperature and time for the accessory.
- Let it heat up and press a test item (mug, hat, etc.) with scrap material to ensure everything is working correctly.
 TIPS:
TIPS:
- Always match plug types when connecting a new accessory — forcing the wrong connector can damage the controller.
- Don’t overtighten bolts – just enough to secure the accessory in place.
- Use silicone pads or protection sheets when pressing plates or hats.
- Wipe surfaces after each use to prevent ink/adhesive residue buildup.