Congratulations on your new Epson EcoTank! To ensure you get the best print quality from the start, please follow these essential setup steps.

1. Software Installation

Your printer includes a CD for installation. If your computer does not have a disk drive, you can download the official software online:

  • Download Link: Epson L3210 Support & Drivers
  • Steps: Scroll to “Download drivers and software,” select your operating system, and choose the Drivers and Utilities Combo Package Installer.

2. Ink Charging (First-Time Setup)

This is the most important step for a new printer. Please follow this sequence carefully:

  1. Fill the Tanks: Match the colors (C, M, Y, K) and fill each tank to the max line. Close the lids securely.
  2. Power On: Connect the power cable and press the Power button.
  3. Initiate Charging: Hold the Stop button (the triangle inside a circle) for 5 seconds.
  4. Wait: The power and ink lights will flash. The process takes approximately 11 minutes. Do not turn off the printer until the lights stop flashing.

3. Print Head Preparation (Videos below)

Before you start your first project, you must ensure the ink is flowing perfectly. Missing lines in a print are usually caused by air in the heads.

  • Nozzle Check: Run a nozzle check via your printer software.
  • Head Cleaning: If lines are missing, hold the Stop button for 3 seconds to run a cleaning cycle, then check the nozzles again.

Helpful Training Videos:

Pro Tip: To prevent the print heads from drying out or blocking, try to print at least one color page every few days.

Manual Cleaning Guide:

Software Cleaning Guide:

Whether you are setting up a brand-new system or refilling your current tanks, getting your ink in correctly is the first step toward high-quality prints.

CRITICAL NB: Always fill your ink tanks before turning on your printer for the first time. This prevents the pump from drawing air into the lines.

Here are the three most efficient ways to fill your sublimation ink tanks:

Method 1: Using 4 Ink Pipes (One for Each Color)

  • Best For: Bulk systems or printers with larger external tanks.
  • The Process: Connect a dedicated pipe for each color (CMYK) between your ink bottle and the tank.
  • Pro Tip: Gravity does the work for you—no need to squeeze. Just keep a close eye on the ink levels to ensure you don’t overfill.

Method 2: Using 4 Syringes (One for Each Color)

  • Best For: Precise manual refilling and minimizing mess.
  • The Process: Use a separate syringe for each color to draw ink from the bottle and gently inject it into the correct tank.
  • Pro Tip: This is the most accurate way to measure exactly how much ink you are adding, which helps avoid any accidental spills or overfilling.

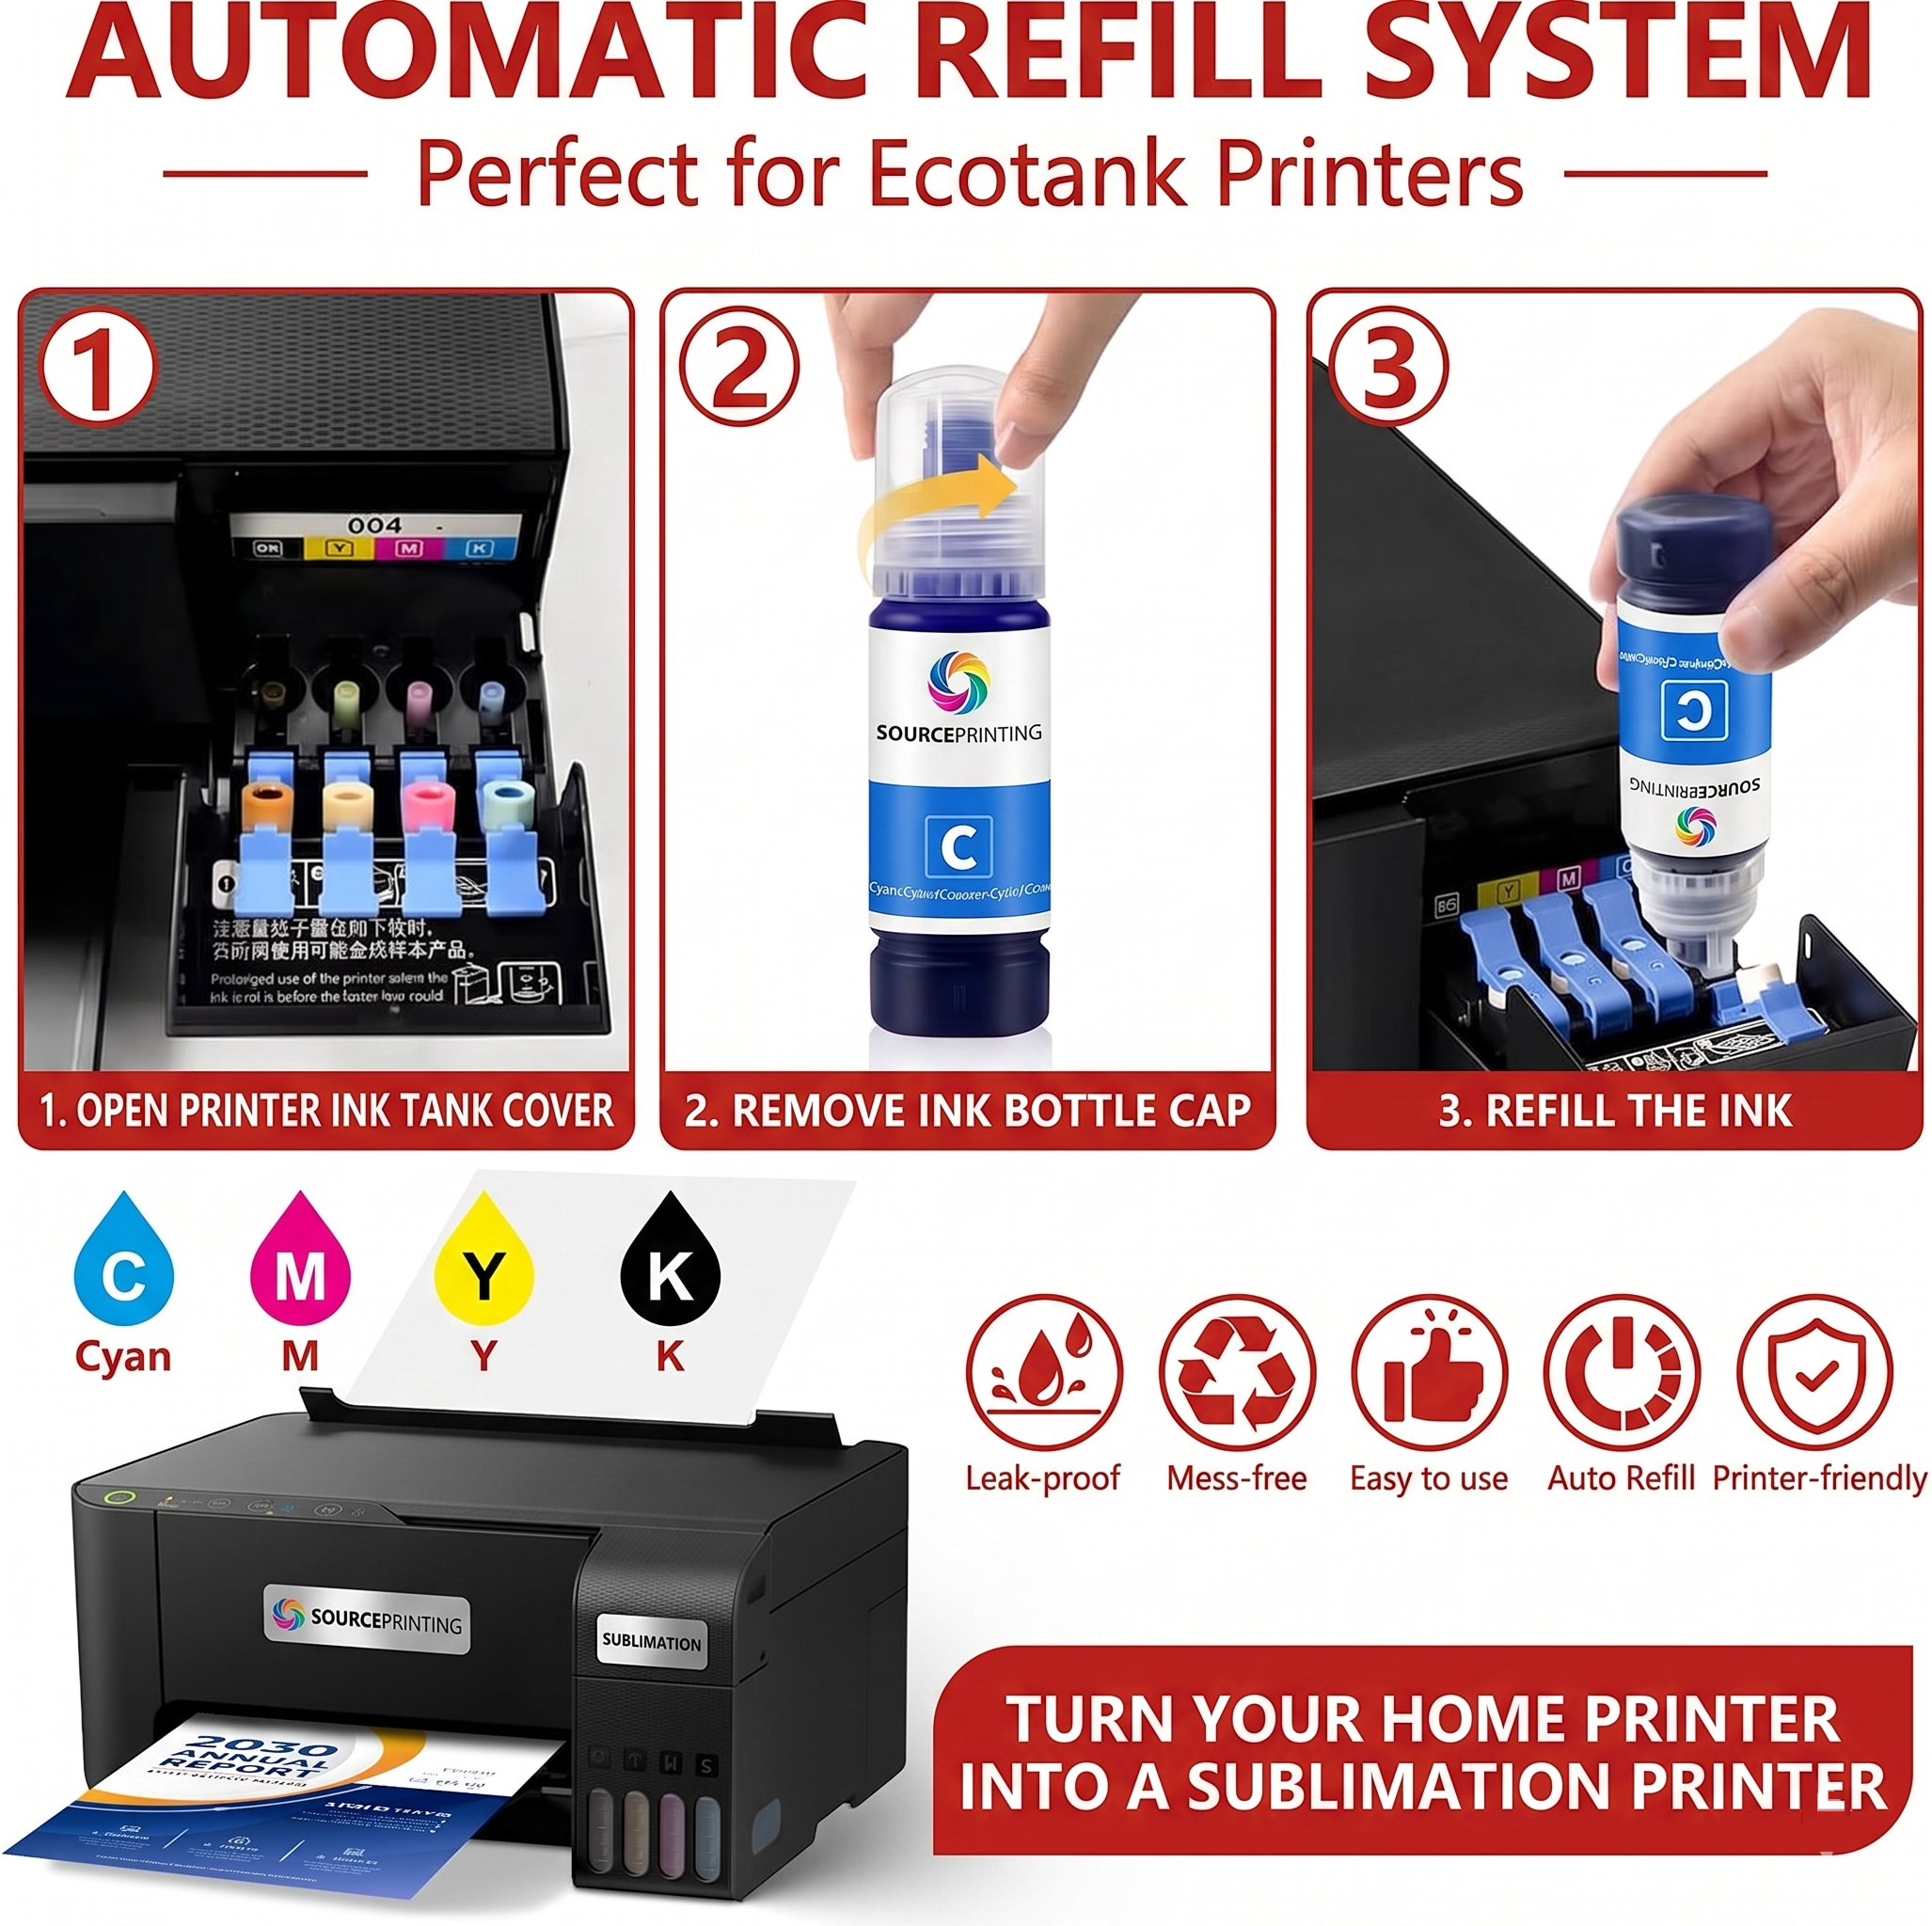
Method 3: Using Compatible Easy-Fill Bottles

  • Best For: Standard EcoTank-style printers (like the Epson L-Series).
  • The Process: Simply open the tank lid, invert the compatible bottle, and place it directly onto the tank’s intake valve.
  • Pro Tip: Do not squeeze the bottle. The ink will flow automatically and stop when full. Watch the ink gauge on the front of the printer to ensure the level stays within the “Max” line.

At Source Printing, we provide the tools and technical advice to help you build your sublimation business from ink to income! If you need any assistance with your setup or need to order high-quality sublimation ink, reach out to our team today.

Extra Videos on Software and best sublimation tips.

Free Sublimation Software: 3 Options to Print ANY Size

5 Ways to Sublimate on a Black Shirt! | How to Sublimate on Black | Sublimation on Dark Colors

The Best Colored Shirts for Sublimation and How to Use Them

Sublimation T Shirts for Beginners - Full Process Start to Finish

10 Common Sublimation Printing Problems and How to Solve Them