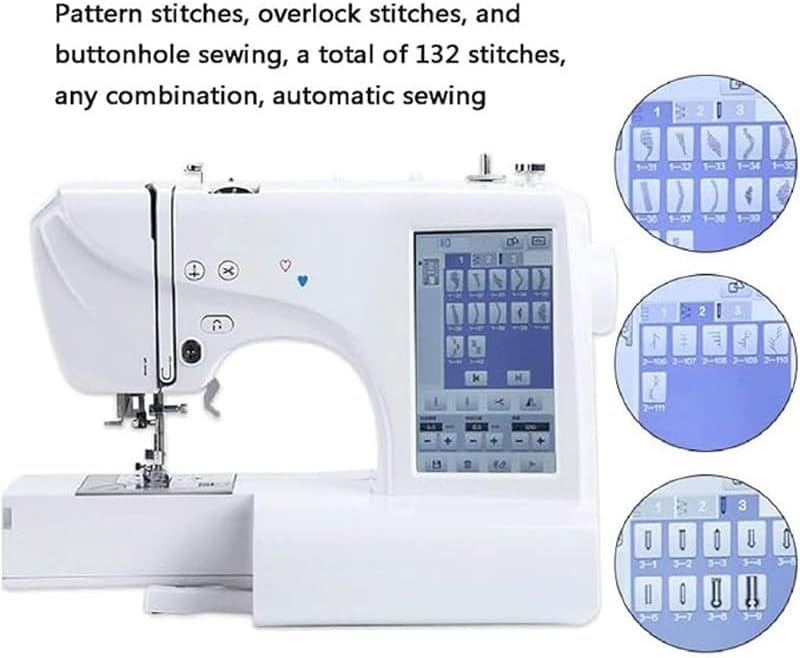
Combining the specific technical data for the Computerized Embroidery & Sewing Machine with industry-standard domestic embroidery practices, here is your complete, master-level operational guide.
Part 1: Technical Specifications & Machine Setup
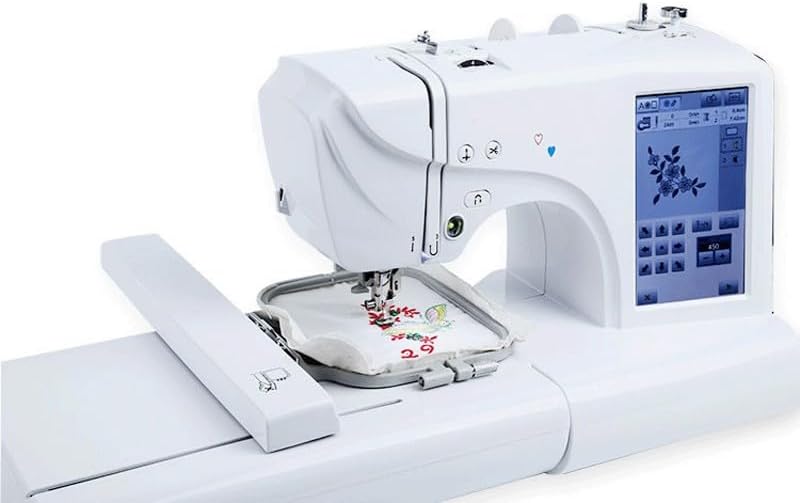
The Yinghe ES5 is a single-needle powerhouse with a larger-than-standard frame size. Knowing these limits prevents mechanical errors.
- Embroidery Area: $100 \times 235\text{ mm}$ (Significantly longer than the Brother M330e’s $100 \times 100\text{ mm}$).
- Max Speed: 850 SPM (Embroidery) / 650 SPM (Sewing).
- File Format: .DST is the primary format for the ES5.
- Needle System: Standard 130/705 H (Flat-shank).
Note: Use 75/11 for standard thread and 90/14 for heavy fabrics like canvas or workwear.
Part 2: The Core Workflow (Step-by-Step)
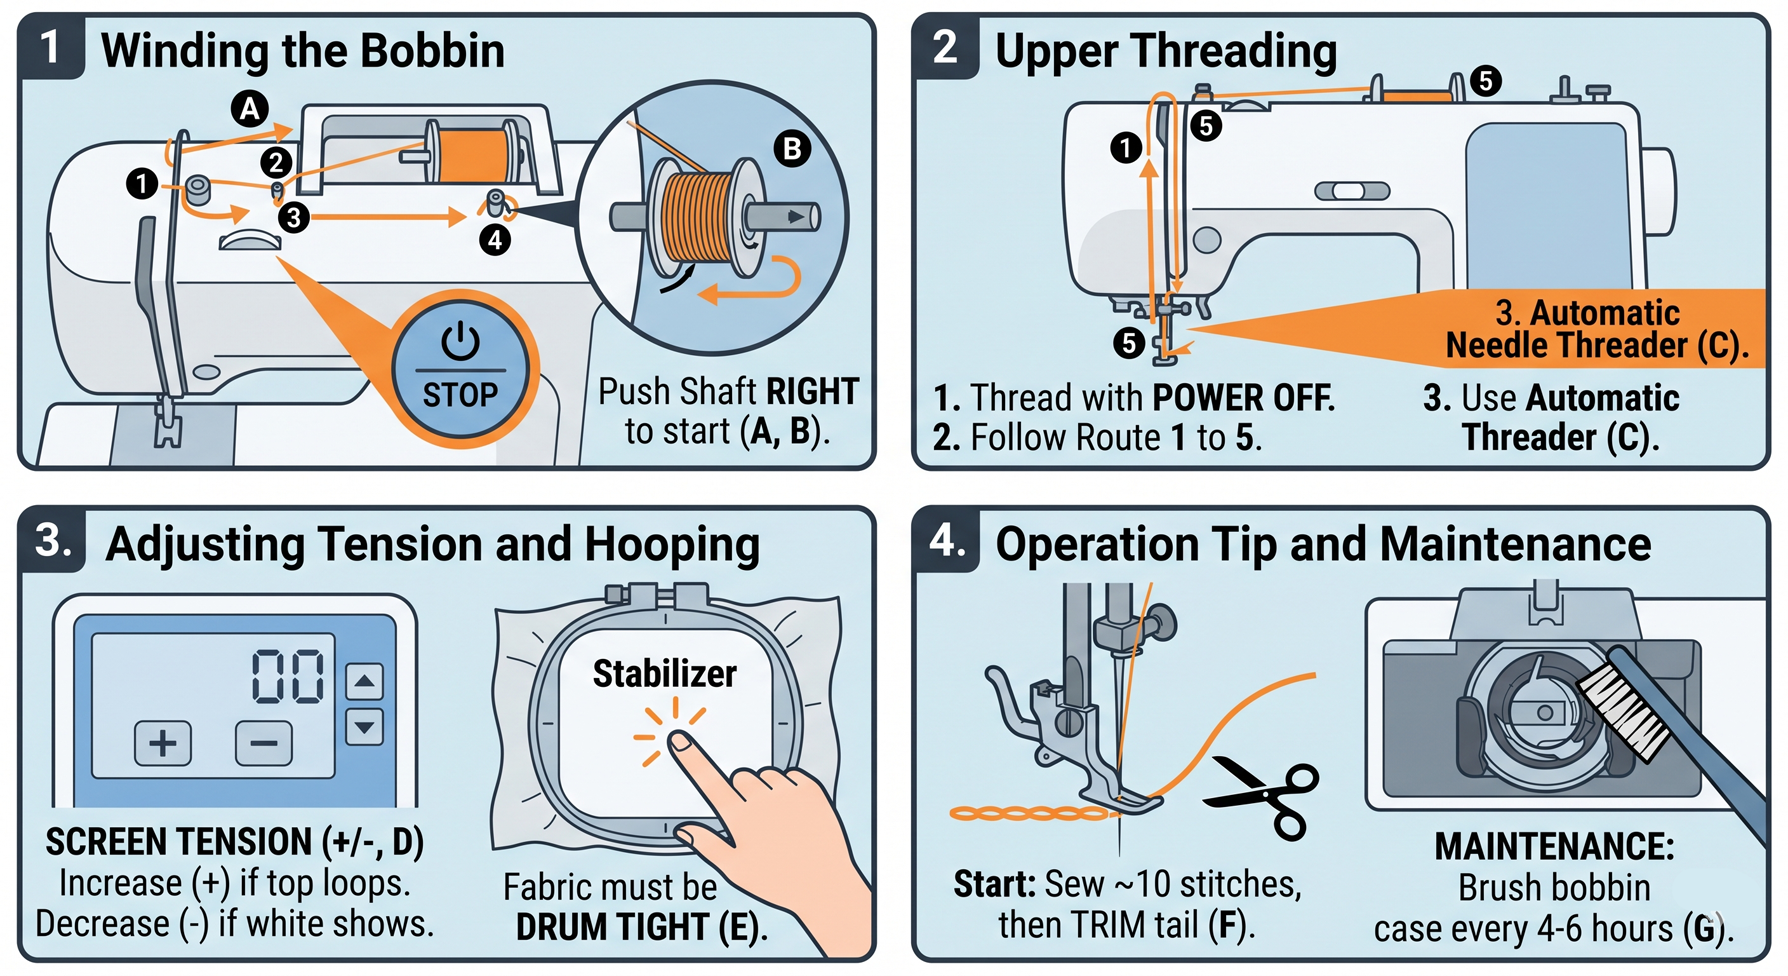
1. Threading & Bobbin
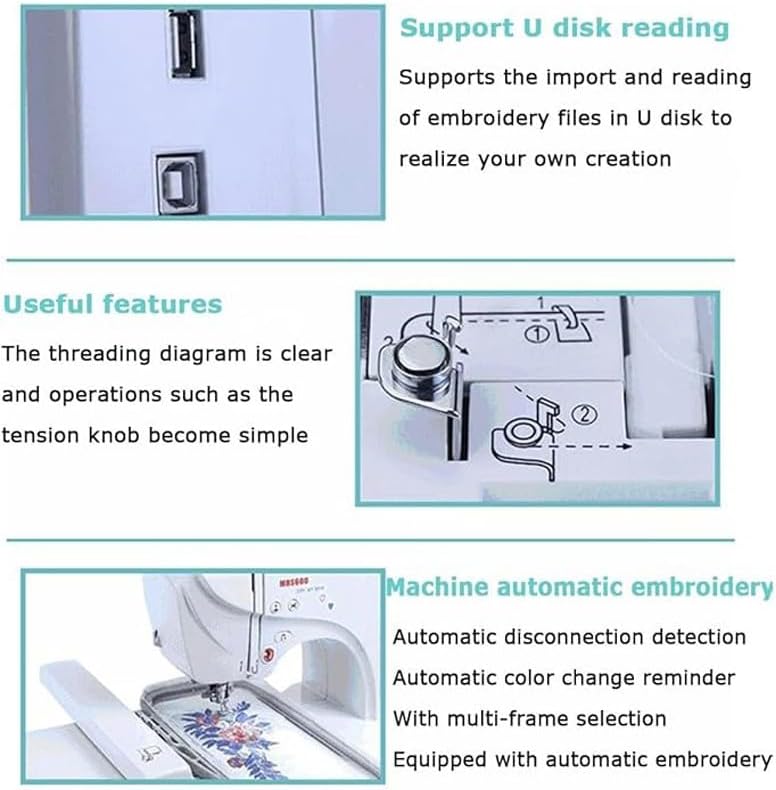
- Upper Thread: Power OFF. Follow the path numbered 1 to 5. Ensure the thread clicks into the Take-up Lever. Use the automatic threader only when the needle is at its highest point.
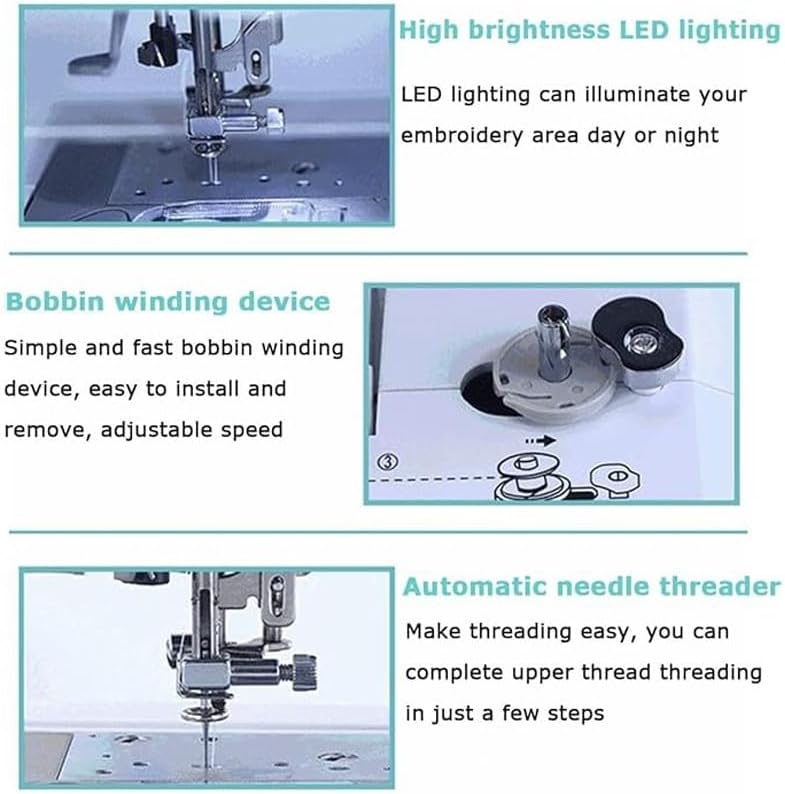
- Bobbin: Place the bobbin so it rotates counter-clockwise. Guide the thread through the tension slit and pull it toward the built-in cutter.
- Winding: Push the winding shaft to the RIGHT to engage the motor. Stop when it is 80% full to avoid tension spikes.
2. Hooping & Stabilization (The “Pro” Layer)
- The Drum Test: Fabric must be tight. If you tap it and it sounds like a drum, you’re ready. If it sags, the design will “pucker” (wrinkle).
- Stabilizer Choice:
- Tear-Away: For towels, caps, or stiff woven fabrics.
- Cut-Away: Essential for anything stretchy (golf shirts, T-shirts).
Hoop Installation: Slide the hoop into the metal carriage slots until it clicks. Ensure the fabric is not caught under the frame.
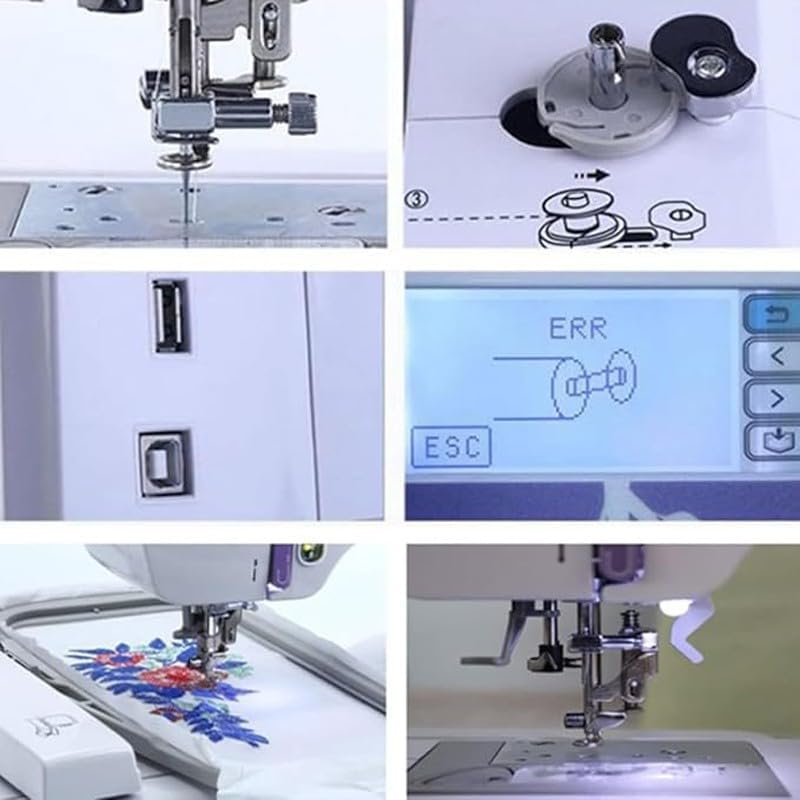
3. Software & USB Management
- USB Prep: Format your drive to FAT32.
- File Naming: The ES5 prefers simple names. Use ONLY letters and numbers (e.g.,
Job123.dst). Special characters (@, #, !) can cause the file to disappear on the screen. - Design Limits: Do not attempt to scale a design up or down by more than 20% on the screen. Anything more requires re-digitizing in software to adjust the stitch density.
Part 3: Advanced Operation & Troubleshooting
The “5-Stitch” Start
- Lower the presser foot and press Start.
- Let the machine take about 5 to 10 stitches, then press Stop.
- Trim the thread tail sticking out from the needle.
- Press Start to resume. This prevents “bird-nesting” (thread bunches) under the fabric.
Tension Management
- Top Thread Looping: Increase tension (+).
- White Bobbin Thread Showing on Top: Decrease tension (-).
- The 1/3 Rule: On the back of a perfect embroidery, you should see 1/3 top thread, 1/3 bobbin thread, and 1/3 top thread.
Routine Maintenance
- Every 4-6 Hours: Remove the needle plate and use a brush to sweep out the bobbin housing. Lint is the #1 cause of broken needles and skipped stitches.
- Needle Replacement: Change your needle every 8 hours of active stitching or after any major thread jam. A dull needle will “pop” the fabric and cause blurry designs.